
Empowering Artistic Excellence with Professional-Quality Canvas Stretchers
Good art deserves good bones!
Craftsmanship, precision, and innovation in stretcher frames for art destined for galleries, exhibitions, and collections.
Quote / Order FormShop Now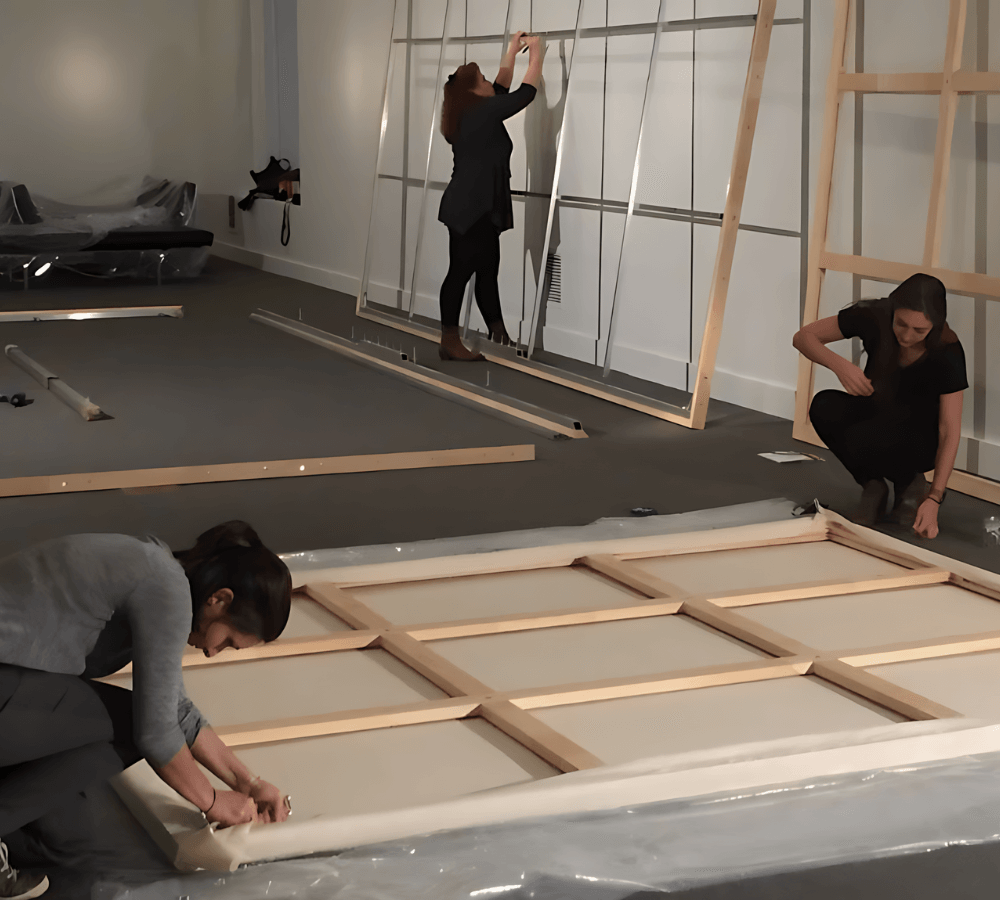


Why Upper Canada Stretchers?
23+ years in business and over 7,000+ customers served
Our mission is to provide premium-quality, customizable art supports that maintain structural integrity and durability over time. We ensure that every product enhances the value and presentation of the art it supports.
Learn more about usOur Products
Wood Canvas Stretcher Bars
Discover our range of precision-crafted wood stretcher bars and frames, available in both stock and custom sizes, designed to meet the highest standards of durability, stability and support.
Aluminum Canvas Stretcher Frames
Our premium aluminum stretcher bars deliver maximum stability and precision for all sizes of canvases and demanding environments.
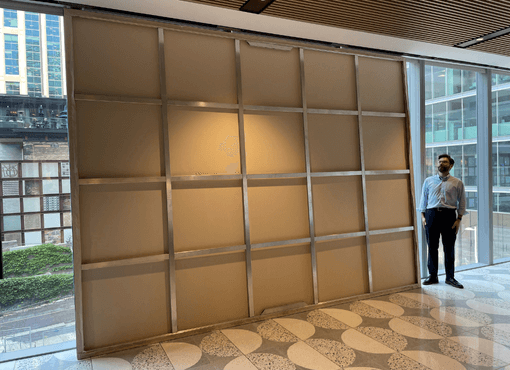
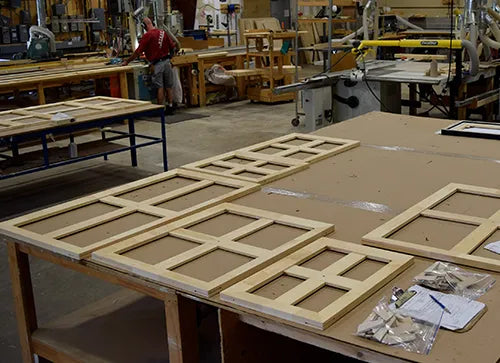
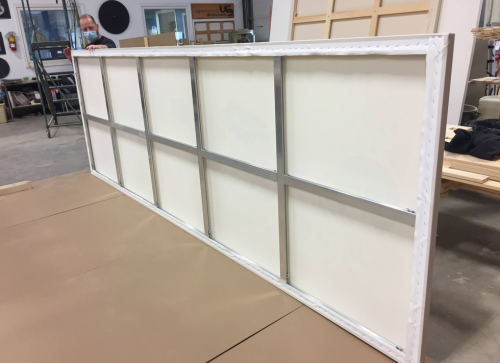
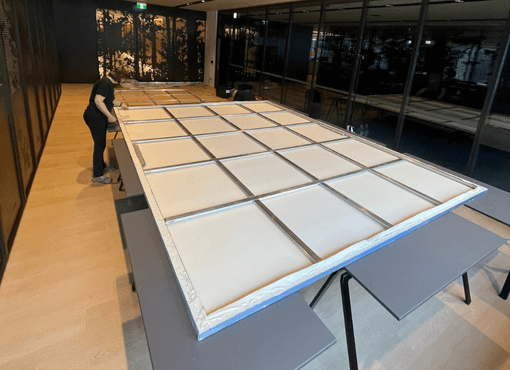
Extra-Large Wood & Aluminum Canvas Stretchers
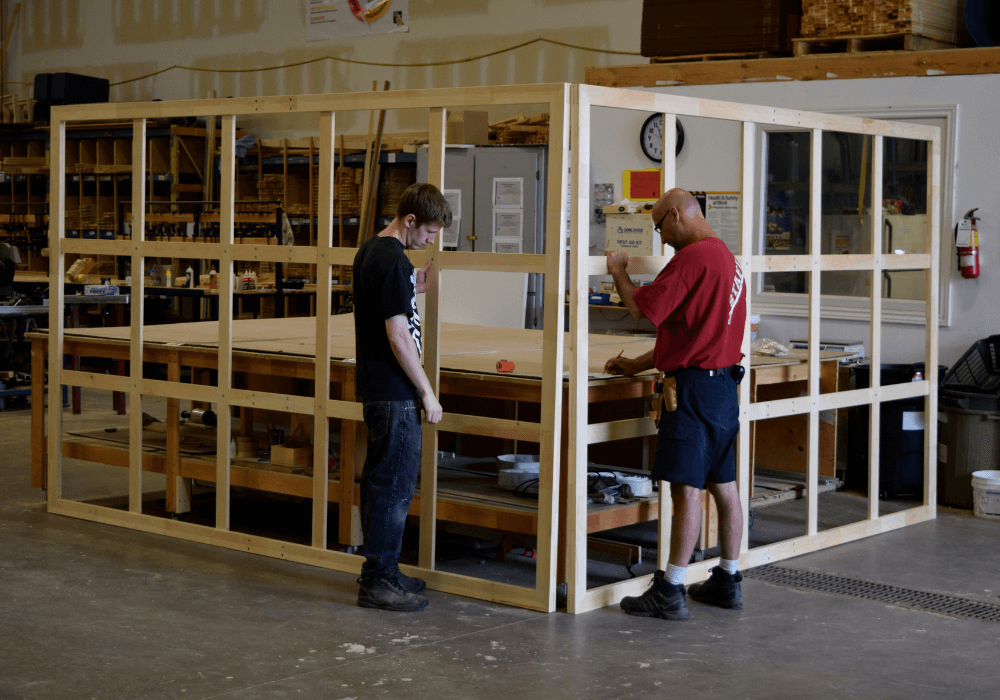
Stretcher bars longer than 6 feet need stronger bars and extra bracing support to keep them straight and true. Our Heavy-Duty and Aluminum options give an excellent selection to accommodate frames as large as 40+ feet!
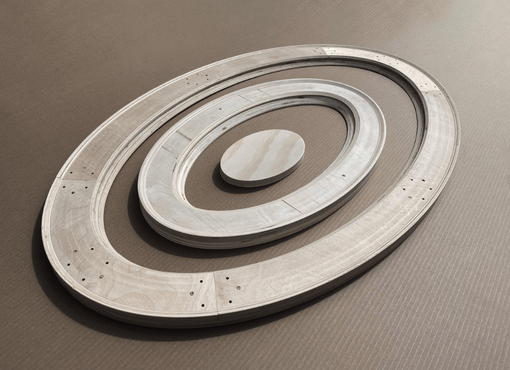
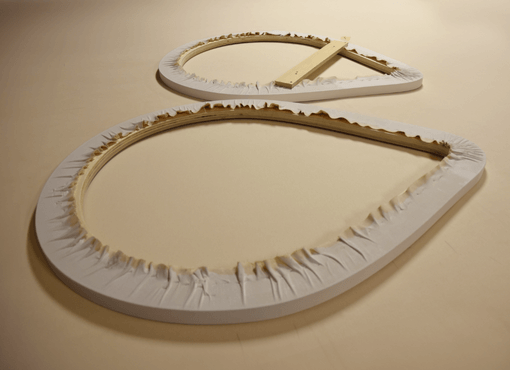
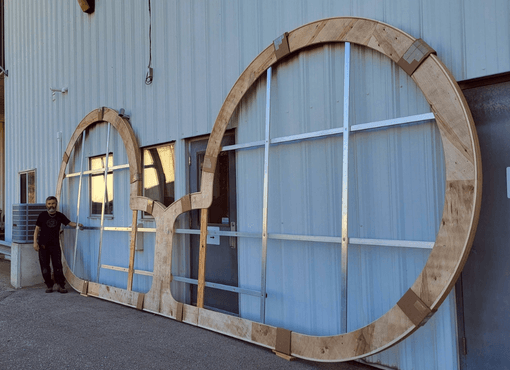
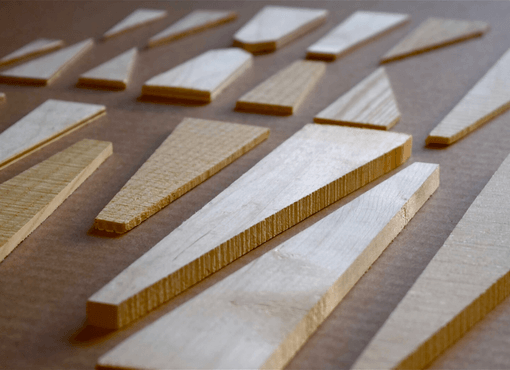
Shaped Canvas Frames & Panels
Find unique shaped panels and strainers, including round and oval options, expertly crafted to add a distinctive touch to your artwork.

Art Panels
Explore our premium art panels, offering a solid and reliable surface for your artwork, available in various sizes and shapes for all your creative needs.
Floater Frames for Canvases
Enhance your artwork with our elegant floater frames, designed to give the illusion that your canvas is floating within the frame.
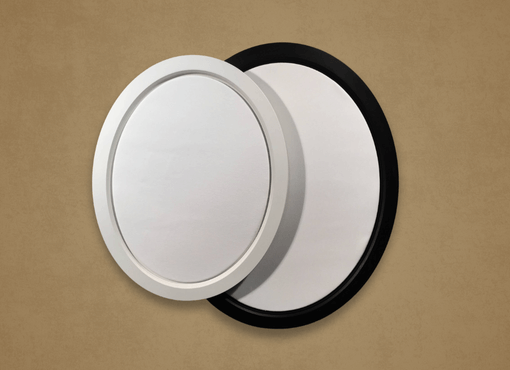
Impress Round/Oval Framed Canvases & Stretchers
Finally, an affordable, fast, and easy option for framed round and oval canvases! Choose ready-to-paint canvases or stretchers for existing paintings or prints on canvas.
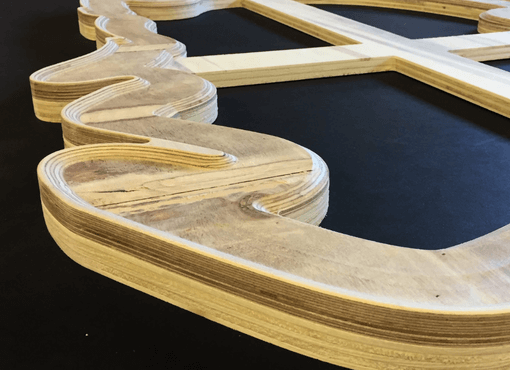
Custom-Shaped Canvas Frames & Panels
Order panels, stretchers and strainer frames in custom shapes, crafted with precision to fit your unique artistic vision and requirements.
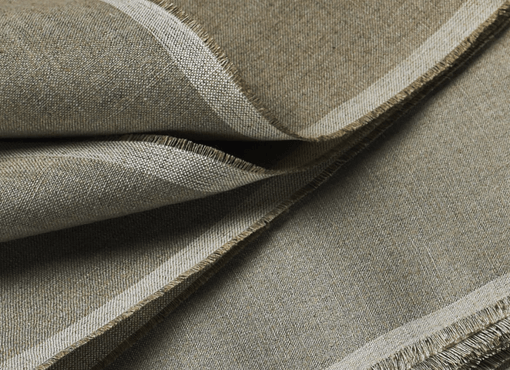
Cotton & Linen Canvas
Quality 100% cotton and Belgian linen canvas, available in various weights and widths, both primed and unprimed.
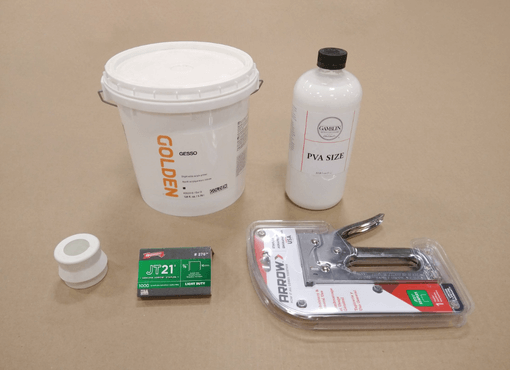
Canvas Stretching Tools & Gesso
Complete your setup with our range of essential accessories, including gesso, PVA sizing and stretching tools, to ensure your artwork is perfectly prepared.
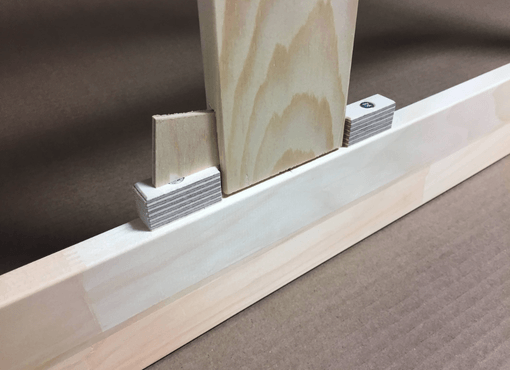
Universal Braces
Keyable braces designed to work with any existing wooden frame, providing additional support for stretched canvases without having to restretch. Also available with our stock-sized bars and bundles.
On Sale
Take advantage of our special offers and discounts on select art supports and accessories. Quantities are limited.
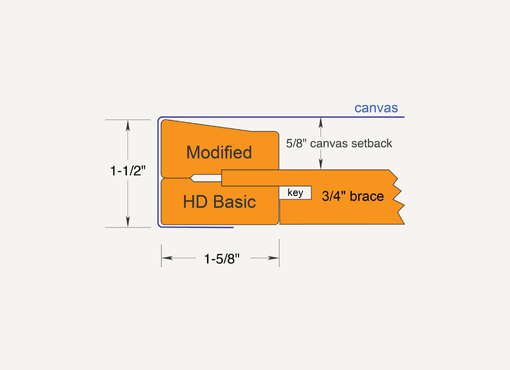
Customized Stretcher Designs
From minor modifications to our existing stretcher profiles to something completely custom, we will work with you to ensure the result meets your needs.
Our Services
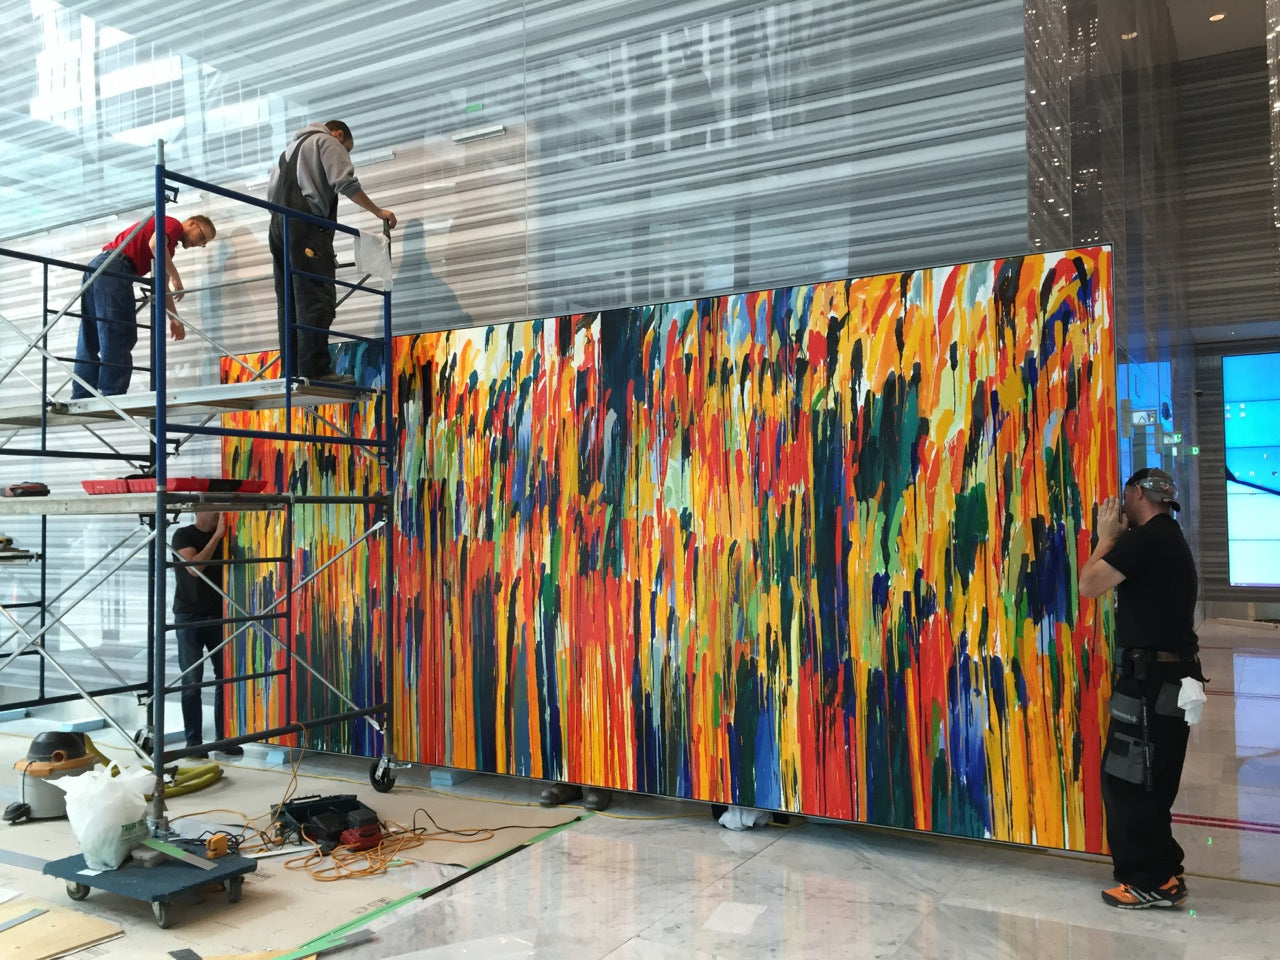
Local Delivery, Art Pickup & Drop-off Service
We do a monthly delivery to Greater Toronto and the surrounding area, during which we can provide secure transport of artwork, such as from your studio to a gallery.

Canvas Stretching for Locals
Through pickups or our local delivery service, we can provide stretched canvases and art panels too large for courier services.
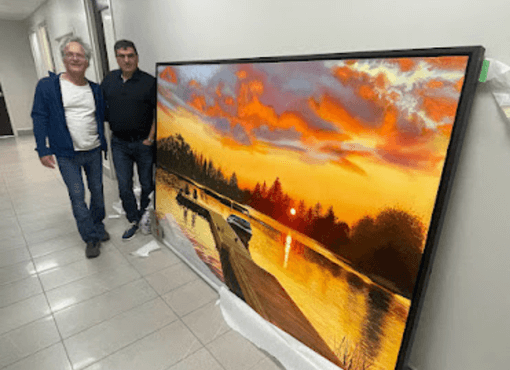
Custom Stretched Canvases
Whether it’s balloons, blimps or boxing bags, we can create custom stretched canvases tailored to meet your exact specifications.
Custom Design & Fabrication
Bring your most ambitious ideas to life. Innovative and customized solutions for your intricate and multi-dimensional art pieces.
Custom Canvas Keys
Missing keys for an existing stretcher frame? We can craft replacement keys in hardwood or plywood to your exact requirements, so you can maintain the tension and integrity of your stretched canvases.
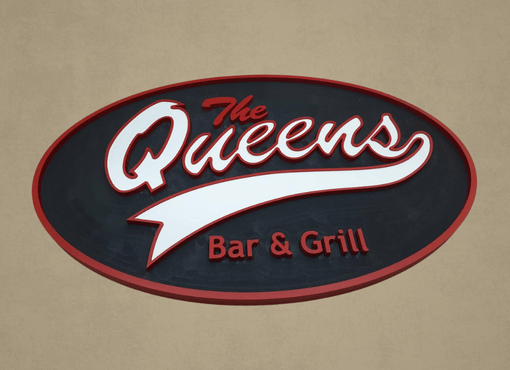
Custom Signage, Architectural Elements & Component Production
Our advanced CNC machining services ensure your designs are produced with flawless precision and repeatability.
On-site Consulting Services: Assembly, Stretching & Installation
For large projects, we can provide staff to assist with frame assembly, stretching, and installation at your location.
Testimonials
With over 7000 satisfied clients, including some of the most well-known artists and prestigious institutions in North America, Upper Canada Stretchers is a trusted partner in the creative process. Here's what some of them have to say: